Splitting up a storyboard in an Objective-C/Swift mixed legacy project
How do you go about splitting up your storyboard into multiple smaller storyboards? And why would you? In this article I’ll tell you why we wanted to do this, what kind of problems we encountered along the way, and how we solved them.
The problem: Large storyboards makes iOS developers into sad pandas
As the FINN app has grown the last few years, so has our storyboard. Using storyboards means you get several useful features, and it can give you a visual conceptual overview of how your app works. I say “can”, because this is not necessarily the case. Also, using storyboard has some quirks that are not always appreciated when multiple developers are working on the same project. Any small change to a storyboard might mean several changes to the storyboard xml. In addition to this, XCode has an annoying tendency to recalculate coordinates for several storyboard items just because you opened the file! And yet another annoyance is that the larger your storyboard, the slower it is to work with. We usually waited at least 5 seconds just for the file to open, and actions were often laggy.
So, the iOS team had long ago decided it was time to split it up, but that job is not necessarily easy. Or small. Or even fun. And the Jira task for it also stated “Beware of scope creep…”. Yeah, it crept.
The FINN app: Some history
The current FINN app was launched in August 2013. During these three years, the app has of course grown a bit, and during the last year or so several new features have been added using Swift, and quite a few of the older Objective-C classes have been rewritten in Swift. However, the majority of the code base is still Objective-C. Interoperability between Swift and Objective-C is therefore crucial.
A quick count of files says that we currently have 171 Swift files and 349 .m files in our project (not counting third-party code, of course). These files contain >44,000 lines of code, comprised of 30,000 lines of Objective-C code and >14,000 lines of Swift code (excluding comments and whitespace).
Starting out small
We decided to start small and extract the part of our app called “Min FINN” (My FINN) to its own storyboard first. This is a fairly autonomous, although not quite, part of the app. Most of the navigation within this part of the app is internal to that feature, but there are a few entry points into it from other parts of the app.
Some of the navigation is done by segues, but there are multiple places that instantiates the scene’s viewcontroller via the storyboard directly. This, of course, means code like this is littered throughout the codebase:
FINSearchListViewController *resultViewController = [self.storyboard instantiateViewControllerWithIdentifier:@"resultListViewController"];There are 2 problems with this:
- It refers to “self.storyboard”, which means it will only work as long as the viewcontroller exists on the same storyboard as the current viewcontroller
- It uses a hard-coded string to refer to the storyboard identifier “resultListViewController”, which is error-prone
We needed a better way.
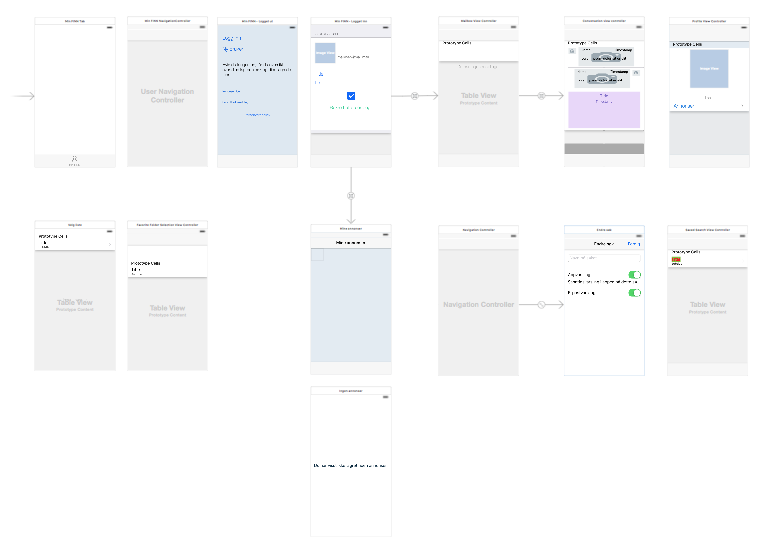
When we started out, this is how our MainStoryboard_iPhone looked like:

Yes, kinda messy and not necessarily super-manageable. And not very informative either, conceptually. So how do we go about splitting it up?
With XCode 7, we got a new, nice feature - Refactor to storyboard… :

You just select all the scenes you want to extract and then this refactor feature will both create a new storyboard for you, and it will wire up any connections between scenes in the old storyboard and the new storyboard. This, however, doesn’t work if you’re supporting iOS 8 AND you’re using relationship segues (i.e. segues from a UITabBarController).
Which is the case for us, of course. But, at least it gives us a handy shortcut for extracting the scenes into a new storyboard. We just deleted the resulting storyboard references. Besides, for non-relationship situations we would be on our own anyway.
Juggling two storyboards
Ok, so now we had a new storyboard, with just the “Min FINN” scenes:
Most of the “self.storyboard instantiateViewControllerWithIdentifier calls spread out around the code still work, but not all. For example, in some areas of the Min FINN storyboard, we open up the FINObjectViewController that is still on the MainStoryboard. And there are a couple of scenes on the Min FINN storyboard that are accessed from scenes on the main storyboard. How can we know at call site which storyboard a given scene is located on? There are many such invocations. And as we later down the line continue to split up the main storyboard, this will be even more fragmented. We needed a common place to handle this so that the call site didn’t need to know where a given scene is located.
Generating common code
We started out by searching for already existing tools that could help us. We found several, among them Swiftgen, and tried them all. Swiftgen is a very thorough and well-written tool for generating enums and structs that handle multiple storyboards. However, it supports only Swift and cannot be used for Objective-C, making it a no-go for us. It’s also quite elaborate with enums, structs, protocols and extensions, and outputs a fair amount of code. Most other tools we found were either Swift-only or Objc-only, or they created only constants for the identifiers.
But we very much liked the Swiftgen approach of creating functions that can be called directly, and that will return an instance of the correct class.
So we decided to create our own generator. The first iteration was to create a Swift-class that did not rely on Swift enums that are unusable in Objc, and that could be called from both Swift and Objc. This seemed absolutely doable, and our first generated Swift-file had static functions like this:
static func instantiateWebViewController() -> FINWebViewController {
    return self.storyboard.instantiateViewControllerWithIdentifier(MainStoryboardIdentifier.WebViewController.rawValue) as! FINWebViewController
}

static func instantiateFrontPageSearchViewController() -> FrontPageSearchViewController {
    return self.storyboard.instantiateViewControllerWithIdentifier(MainStoryboardIdentifier.FrontPageSearchViewController.rawValue) as! FrontPageSearchViewController
}
Objective-C compiler complaining
Looks pretty good, right? One would think so. Except, it doesn’t work in Objective-C. Why? The FINWebViewController is an Objective-C class, and therefore has that name on both sides of the table. Win! The FrontPageSearchController, however, is a Swift class, and therefore has the name “FINFrontPageSearchViewController” on the objc side of the table. Doh! When the instantiateFrontPageSearchViewController was called from objc it didn’t work, because the expected class was FINFrontPageSearchViewController and the returned class was FrontPageSearchViewController.
After a lot of trial and error (I can assure you that I’m sparing you a lot of painful details here), we finally gave in and decided to generate separate instantiator classes for objc and Swift. Win! Or was it?
Not really. Since some of the Swift view controllers are used from both objc and Swift, we annotate them with the objc name:
@objc (FinUserAdListViewController)
class UserAdListViewController : UIViewController, UICollectionViewDataSource, UICollectionVi...
That’s all well and good, but since our Python script parses the storyboard files and extracts the storyboard identifiers and their respective custom class names (if any), we had class names with the prefix (objc classes) and class names without the prefix (Swift classes). This enabled us to check for this prefix while generating. When generating Objc code, we added the prefix to the Swift classname, and when generating Swift code, we left it as is. Remember, in the storyboard, the non-prefixed Swift class name was used.
Now, this resulted in compiler warnings like this:

Double-you tee eff? Even though the UserAdListViewController class is annotated with the prefixed name, this doesn’t work. Since we practise zero-tolerance for warnings in our project, we needed to fix this. What about casting it to the class it’s supposed to return? Let’s give it a shot:

Warning gone! Now it HAS to work! Yes?
No. Although we’re instantiating a viewcontroller that is listed in the storyboard as a UserAdListViewController, which is annotated as a FINUserAdListViewController, this does not return a FINUserAdListViewController objc instance. What does it return? A UIViewController…
(To be clear, the hurdles I’m listing here are probably less than half the hurdles and dead ends we’ve met. You would probably be quite bored if I had listed them all. And frankly, I don’t even remember them all anymore. Which is probably a good thing.)
By this time, I was starting to feel somewhat inundated. And was repeatedly asking myself why I had picked this task as my first task as a newcomer to the team.
Allright, what if we define this view controller as “FINUserAdListViewController” (the objc annotated name) in the storyboard scene? Surely, that has to work in Objc?
Lo and behold, it did! Now Objective-C recognizes the class.
Swift compiler complaining
Oh, wait. Now the generated Swift class doesn’t work?

Of course, in the Swift realm, there is no such class. It’s supposed to refer to UserAdListViewController. No problem, we’ll just remove the prefix now when we’re generating the Swift code. But wait. The way we’d known whether a class was an Objc class or a Swift class was to check for this prefix, right? So how do we figure out whether a class found in the storyboard is a Swift class when they ALL have prefixes now?
Ok. What does Objc classes have that Swift classes don’t, that is easily accessible from a script? Header files. So, we created a Python function that crawls through all the files in the project and collects all header-filenames in a Set. Then, when generating the Swift code, we test every class name (with an added “.h”) against this Set. Does the Set contain an entry with this name? Yes -> Objc class. No -> Swift class.
Would it be possible to do that for Swift files instead? No, because there isn’t necessaritly a 1-1 correlation between Swift classes and filenames.
Believe it or not: this was the last hurdle, and we now have generated code for Objc and Swift. For Objc, the generated code looks like this:

And at call site:

Swift generated code:

At call site:

That’s about as simple as you can get it.
Well, almost. You might have noticed we have a Swift enum for the storyboard identifier. We could, of course, skipped the enum and just used the identifier string directly in the instantiate method. We’re undecided on that for now, as we thought we might use the enums for something else. But we might end up removing the enums at a later point.
As you can clearly see, this was not a straightforward task, and Swift/Objective-C in(ter)operability has some rough edges. So, to wrap this up I will list the steps you should follow, and at the end of this list there is a link to the Python script and a demo project if you’re facing the same challenges as we did. The script is unfortunately not optimized and generic so that you can plug and play, but it should be fairly easy to adjust it to your own needs. Feel free to generify it and create a pull request to enhance the script’s usefulness for others!
Setting up your project for generation
1 - Choose a small, reasonably autonomous part of your app that will get the first separate storyboard.
2 - Select the necessary scenes, go to Editor -> Refactor to Storyboard…
3 - Name your new storyboard. If you’re not using relationship segues, the generated storyboard references should work well for you, and you can leave them!
4 - Create a Run script under Buile Phases that will trigger the Python script (follow the guide in the GitHub project for this).
As you can see in the demo project, the MWStoryboardScenes.py file should be placed in your project somewhere. In our projects, we have a Scripts folder for these things, and this is not added to the XCode project (but it is handled by Git as a part of the project, of course).
Now, this script needs to run every time the project is built, before building source files. For a guide on how to set this up, take a look at the GitHub repository readme. You also need to set up paths to your storyboards.
When you’ve run this script for the first time, you have the functions that are necessary to instantiate your view controllers.
5 - Find all places where view controllers are instantiated via the storyboard (and not via segues) and change these invocations so that they use the generated storyboard functions.
As mentioned, a more thorough explanation on how to use the generator is provided in the README of the GitHub project.
Good luck with splitting your storyboard :-)
Tags: ios swift storyboard